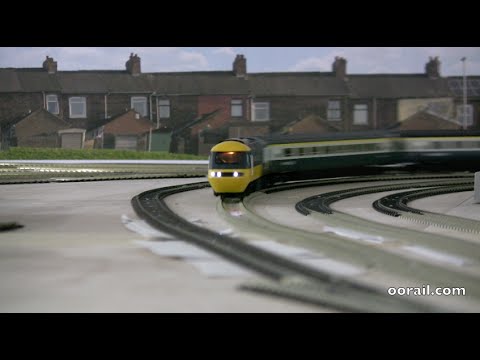
Over the coming months, I will be walking you through the process of how the backscenes were selected for each part of the layout here at oorail. The layout uses a number of backscenes that are blended together. Each article will explain the choices, how the backscenes were blended into the layout and problems that I ran into.
This first article introduces you to the concept of backscenes. In this article I will explain why you might want a backscene and where to buy them. There are links to the original videos produced in 2015 showing the installation of the backscenes.
What is a backscene and why do you want one?
The backscene provides a background for your layout. The correct backscene will create the illusion that your layout continues off into the distance. Without a backscene your layout will lack depth and look unrealistic. The backscene will help hide unwanted parts of the loft, garage, shed, room or basement where your layout is located.

Using the the scene above as an example, taken by my late father (John D. Buswell) of Britannia Class 70013, Oliver Cromwell at the Ais Gill Summit on November 8th 1968. You can see the scene is made up of three basic parts - the foreground, the subject and the background. The foreground in this case is a field with a stone wall, the subject is 70013 with the Fifteen Guinea Special and the background contains rolling hills. You can see below how the scene would look without the background.

What is a Photographic Backscene?
There are several different techniques to achieve a backscene. Many modellers enjoy using paints to create a backscene by hand. This technique works very well for elements such as the sky, distant hills and the shoreline.
Photographic backscenes are a series of photographs that have been digitally stitched together and scaled appropriately for a specific model railway scale. These scenes are printed on a high quality paper which can then be attached to the wall or purpose built boards that attach to the back of your layout.
The backscenes used at oorail are from a company in the UK called Art Printers (https://www.art-printers.com/). They sell backscenes that are 24 inches, 15 inches and 9 inches high. Their products are available in both standard and premium version. The premium products are self-adhesive. The 15 inch Premium Backscenes are what I used at oorail.
How do you pick a backscene?
Selecting a backscene for your layout is just as important as picking a rough location or era for your layout. If your layout is set in the countryside during the early BR days starting in 1948, then selecting a modern industrial backscene just isn't going to work. However a product such as "The Old Mill Town" or "Hills and Dales" from ID Backscenes would work well.
Deciding what to pick depends really on the location and era you are looking to model. Not sure what location and era to model? That is perfectly OK. One option in this case is to browse the selection of backscenes that are available, then looking through railway photographs on-line to find a suitable location and era that matches that backscene. Another option would be to select a handful of railway photographs that you really like and seeing what backscenes are available that are a close or at least plausible match.
The size of your layout and possibly expansion in the future is something to consider as well. There are many packs of backscenes that work together. Each pack consists of two sections that are typically about 1.5 meters (almost 5 feet) in length, so one pack will cover just shy of 3 meters (not quite 10 feet). The Hills and Dales pack mentioned above is available in four packs which would cover just under 12 meters (39.5 feet).
It is possible with clever modelling to use completely different backscenes on a larger layout. You have to be careful that the sky matches up and that you have the space on the baseboards to realistically make the transition work, but its definitely an achievable goal.
Example of How to Pick a Backscene
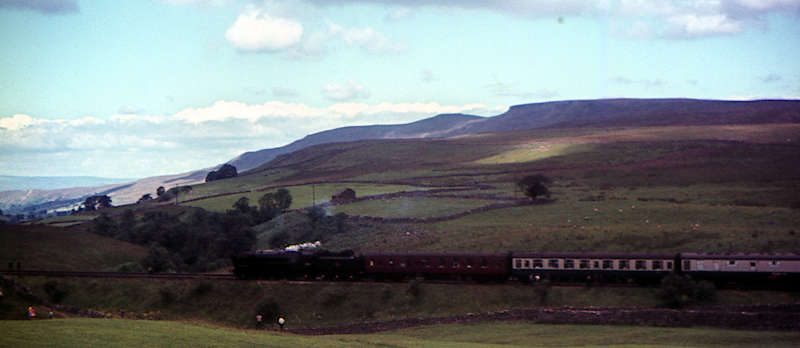
Lets take this photo at Ais Gill Summit as an example. The backscene is going to provide the background from just below the top of the track bed in the bottom left up to the very top of the sky. We're not going to get an exact match but this gives you a bit of modellers license to experiment with the overall look and feel of your layout.
The first thing to decide is what elements of the photo you want to keep, in this case we're going to keep the hillside as we're going to use a slight incline to give the impression the railway is climbing towards the summit. We will also want to keep the proximity of the hillside reasonably close to what it is in the photograph. So the height the hillside reaches in the backscene will be an important factor.
The second thing to decide is the time of year, if you are aiming for a winter scene, then you're not going to want to have trees in full bloom in the background.
With this in mind, I would look at the following backscenes:
- Village 203A (Available in up to 4 packs)
- Hills and Dales 206A (Available in up to 2 packs)
- Old Mill Town 230A (Available in up to 2 packs)
- Harvest Hills 242 (Single pack only)
- Llaneris 255A (Available in up to 2 packs)
- Hills and Dales 207A (Available in up to 4 Packs)
The size of the layout might impact your choice of backscenes for such a project, for example if you are creating a large layout with the incline showing the climb to the summit, then you might want to consider one of the four pack options. If you are just creating a small snapshot of the summit itself, then you might want to consider just one of the 207A Hills and Dales packs that are a close match to the photograph. You might decide you really like the larger mountainous look of Llaneris and alter the scene slightly.
As you can see dropping in different backscenes can produce a completely different look and feel to the scene. Selecting something like 207A will give us something close to the photograph while selecting 203A (Village) will give us a much brighter but flatter scene. Perhaps you like the look of the scene in the photograph but don't want to tackle an incline.
Making Backscenes Seamlessly Work
We will wrap up this introduction to backscenes with a look at how we seamlessly integrated scenes together on the oorail layout...
Next Article...
In the next article I will look at Brewery Road section of the layout at oorail. That article will look at how I blended the backscene into the layout...
Comments