With Autumn rapidly approaching, I thought it would be a good opportunity to get started on my Class 66 RHTT Project. While a number of locomotives can be seen on RHTT duties, the Class 66 seemed like a good choice because Hornby release a relatively cheap version, rather than heavily weathering a much more expensive Bachmann or upcoming Hattons version.
What does this project involve?
Over the next couple of Loco Works Wednesday videos, I will be preparing two Hornby Class 66s for RHTT duties. I will be taking R3777 which is 66005 in EWS livery, adding lights for RHTT running, adding detailing parts, fixing some of the errors with the tooling and heavily weathering the loco. I will also be taking R3778 which is 66097, adding lights for RHTT running, adding detailing parts, fixing some of the errors and adding less weathering to the locomotive than the EWS version. This page will serve as a focal point for the project. If you have comments or suggestions, please leave them in the YouTube videos linked in this article.
What is a RHTT?
The Rail Head Treatment Train or RHTT is a special train that clears leaves off the track by either high pressure water jet or sandite. Sandite is a mixture of sand, aluminum and a special type of adhesive.
Why are leaves a problem?
Leaves are a problem because they can cause traction problems for trains, causing the wheels to slip and even leave damaged flat spots of the wheels. Leaves are natural insulators, so buildup on the rails can cause problems for track circuits, including making trains disappear from occupancy circuits and signaling systems.
Why are you doing this project?
Back in April, I picked up the new Hattons Rail Head Treatment Train, the heavily weathered Water Jet version. Hattons sell both the 'Water Jet' and the 'Sandite' versions in pristine and heavily weathered. The version I have is H4-RHTT-005 which ran me £105, however if you are in the UK (and possibly the EU depending on when you read this), it will run you about £126 with the VAT. Hattons have plenty of these left (as of August 2019), if you are interested.
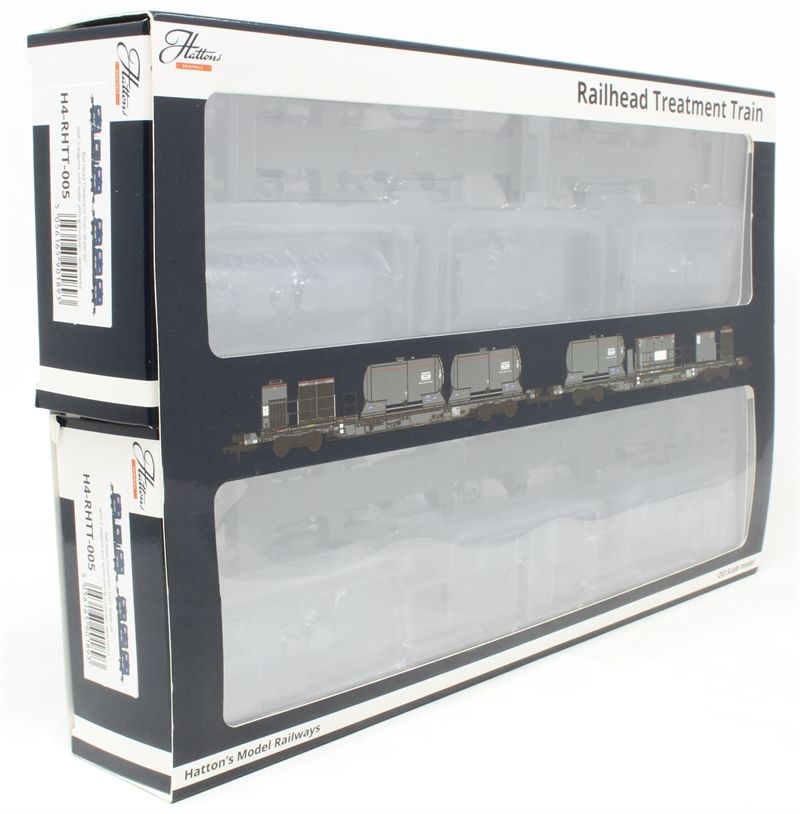
I decided to go with the 'Water Jet' version because these seem to be preferred over Sandite on the real railway. The reason for this is that 'sandite' tends to get into equipment and make a real mess, while the water jet does not. Some locations have static systems that deploy sandite and from my research on-line the 'Water Jet' version seemed to be more common. Either version is going to result in a very heavily weathered locomotive, at least on one end. I liked the look of the weathered version better than the clean version, and I figured it was an opportunity to go crazy with the weathering powders!
The Class 66 seemed to be the most common locomotive used on the RHTT and Hornby's reasonably priced line of Class 66s seemed like a very good choice. At a very reasonable £56.25, it was a lot cheaper than the detailed Bachmann or upcoming Hattons models, neither of which you are likely to want to weather to this degree.
The 'new' Hornby Class 66
So lets not fool ourselves, the Hornby Class 66s that we are using R3777 and R3778 are basically Railroad models, there is nothing wrong with railroad models as long as you set your expectations correctly. These models don't have lights, they have a lot of molded details and they're not the most accurate of models. That said, they're a good foundation to start from and at £56.25 (£74.50 if you live somewhere requiring you to pay VAT), you're not going to lose any sleep if you make a mistake. To be completely honest, this level of weathering is going to cover up any mistakes you could possibly make. This is a very forgiving project!
There is absolutely no difference between these Hornby Class 66 models. The only difference between each one is the livery. These were such a good bargain that I picked up 66779 (Evening Star), 66731 (GBRf livery), 66783 (Biffa) in addition to two used in this project. I deliberately didn't buy the ones I already had on pre-order in the Hattons version. You can watch my review of 66779 (Evening Star) from March below...
The Lighting Arrangement
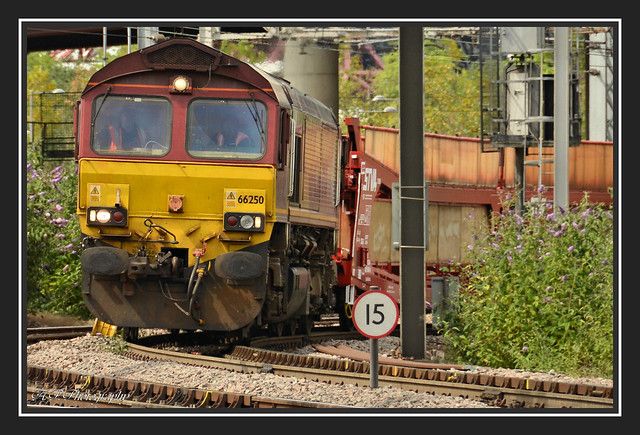
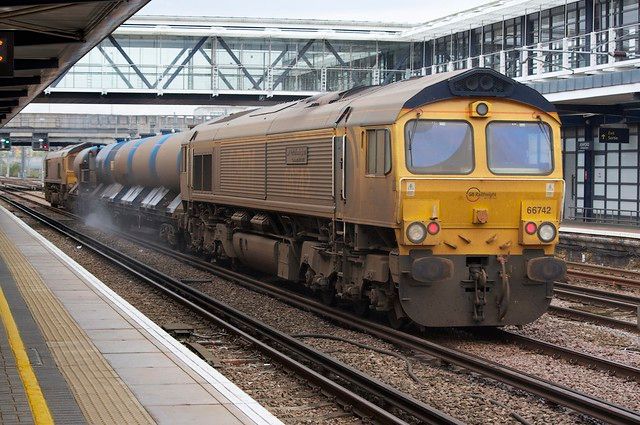
The Class 66 has a couple of different lighting arrangements. There are three marker lights on the front. One is located centrally above the cab windscreen, the other two are located on outside edge of the lights below the cab windscreen. These three marker lights are always on, although depending on the sub-class of 66, these maybe a different shape or style. The Hornby models we have are the earlier version with the rectangular side markers. Which are frequently used on RHTT trains, so we're all set.
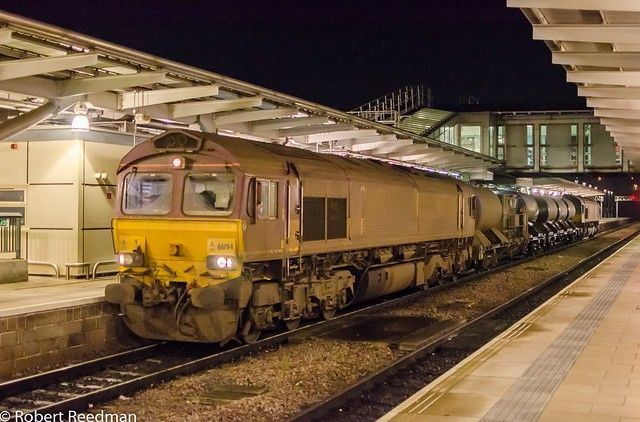
During the day, the right hand (if you are looking at the locomotive head on, this is the one on the left) headlamp is on, and the left hand one is off. However at night, the left hand one is used and the right hand one is off. This is done to reduce the risk of blinding on-coming trains. Whether its night or day, all three front marker lights are used. The class 66 photographs below show daytime and rear of train lighting arrangements. You can see the night time arrangement in the weathered class 66 photograph earlier in this article.
The rear red lights are used only when the train is running light (by itself) or is running at the rear of the train. Under these circumstances, the rear red lights are on regardless of whether its daytime or nighttime.

The newest Class 66/9 locomotives have a dual LED headlamp which can run white or red, they do not have independent headlamp / rear red marker lamps.
Thankfully we are not going to be trying to replicate the Class 66/9, so the Hornby model will work just fine for us. For RHTT running, we are going to keep things simple, since the leading locomotive will be going forwards, we're going to operate it with the daytime running arrangement which would be the three markers and the right hand headlamp. When the locomotive is on the rear, we want the tail lights to be on. The only problem that this causes, is that the locomotive is also going forwards. To get around this problem, we will wire the two locomotives in reverse of each other. What this will allow us to do is simply turn the locomotives around depending on whether they are on the front or the rear of the train. Another option would be to add a switch, but we want to keep this project simple.
Project Shopping List
The following items are going to be used in this project:
- R3777 Hornby 66005 EWS Livery Class 66 - £56.25
- R3778 Hornby 66097 DB Schenker Livery Class 66 - £56.25
- Hattons H4-RHTT-005 - £105
- SMD LEDs (16 x White, 4 x Red) - £5
- SMD Solder Paste - £8
- Weathering Powders - On Hand
- Wiring (24 AWG) - On Hand
- PLA (to 3D print detailing parts) - £20
The approximate cost of the project, which includes getting the locomotives and RHTT is around £250.50. If you need to purchase wiring and weathering powders, you are looking at about another £20-£25.
Equipment we use in this project
- Hot air gun / SMD Rework station (used to apply the solder paste)
- Wire cutters
- Paint brushes
- 3D Printer (if you are doing the extra detailing parts)
The parts used in this project (or in some cases equivalent parts) can be found on our Amazon Shop. If we have inspired or helped you with a project, please consider ordering parts you need from our Amazon Shop as it helps fund the oorail projects:
Click here to visit our Amazon Shop (UK and Europe)
Click here to visit our Amazon Shop (USA / North America)
Research
Before starting the project, I did some research into the exact RHTT I wanted to replicate in OO scale. There are two types of train - 3Jxx and 3Sxx. The 3Jxx are Water Jet (hence the J) and the 3Sxx are Sandite (hence the S). The XX is replaced with a number depending on the train. I discovered that 3J11 has to cover a very large area and typically involves eight tanks. To model this you would need both H4-RHTT-005 and H4-RHTT-006 (which provides 3 extra tanks for about £63 (or £50.40 if you are not required to pay VAT). This particular train could often take up to 16 hours to complete. There are plenty of 3Jxx examples that use just the five tanks that come with H4-RHTT-005.
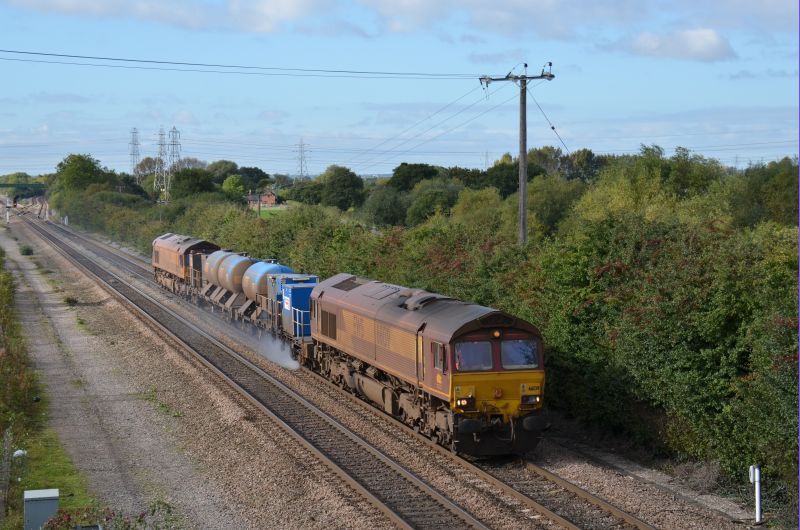
Below are a collection of photographs of RHTT, these are the weathering reference photos used for this project.
A number of other photographs were also used as reference photos for this project, unfortunately due to their licensing I cannot display them here, but here is a list of Flickr links you can follow:
- https://www.flickr.com/photos/47500cdb/15339502043/
- https://www.flickr.com/photos/ianl2/7124711281/
- https://www.flickr.com/photos/benbeaver95/10979052615/
- https://www.flickr.com/photos/tom_merrill/15415206660/
- https://www.flickr.com/photos/28825728@N08/11098935444/ (**)
- https://www.flickr.com/photos/28825728@N08/11099012103/ (**)
- https://www.flickr.com/photos/colin_outandabout/15560781068/
- https://www.flickr.com/photos/darlo2009/15372331450/ (**)
- https://www.flickr.com/photos/58935639@N07/8211414725/
- https://www.flickr.com/photos/95155237@N07/23679397462/ (**)
- https://www.flickr.com/photos/darlo2009/22731274386/ (**)
- https://www.flickr.com/photos/40862240@N03/15677288278/
- https://www.flickr.com/photos/d1021/31174181030/ (**)
- https://www.flickr.com/photos/68628359@N04/22566353157/ (**)
- https://www.flickr.com/photos/darlo2009/44842569825/ (**)
- https://www.flickr.com/photos/darlo2009/30761630075/ (**)
- https://www.flickr.com/photos/darlo2009/30871585692/
The above links denoted with ** were ones that heavily influenced the weathering for this project.
In addition to weathering, I was aware that some of the roof detail sat too low on the Hornby model, so these were important photos in getting that fixed and adding extra detail...
Finally before embarking on the project, I checked out some YouTube videos showing RHTT water jet trains, the last video shows 3J11 with the eight tank configuration:
Project Part 1: Class 66005
In the first part, we take a look at the RHTT Water Jet from Hattons, the Class 66 - 66005 and 66097 from Hornby, and we start work on 66005.
Project Part 2: Enhancing 66005
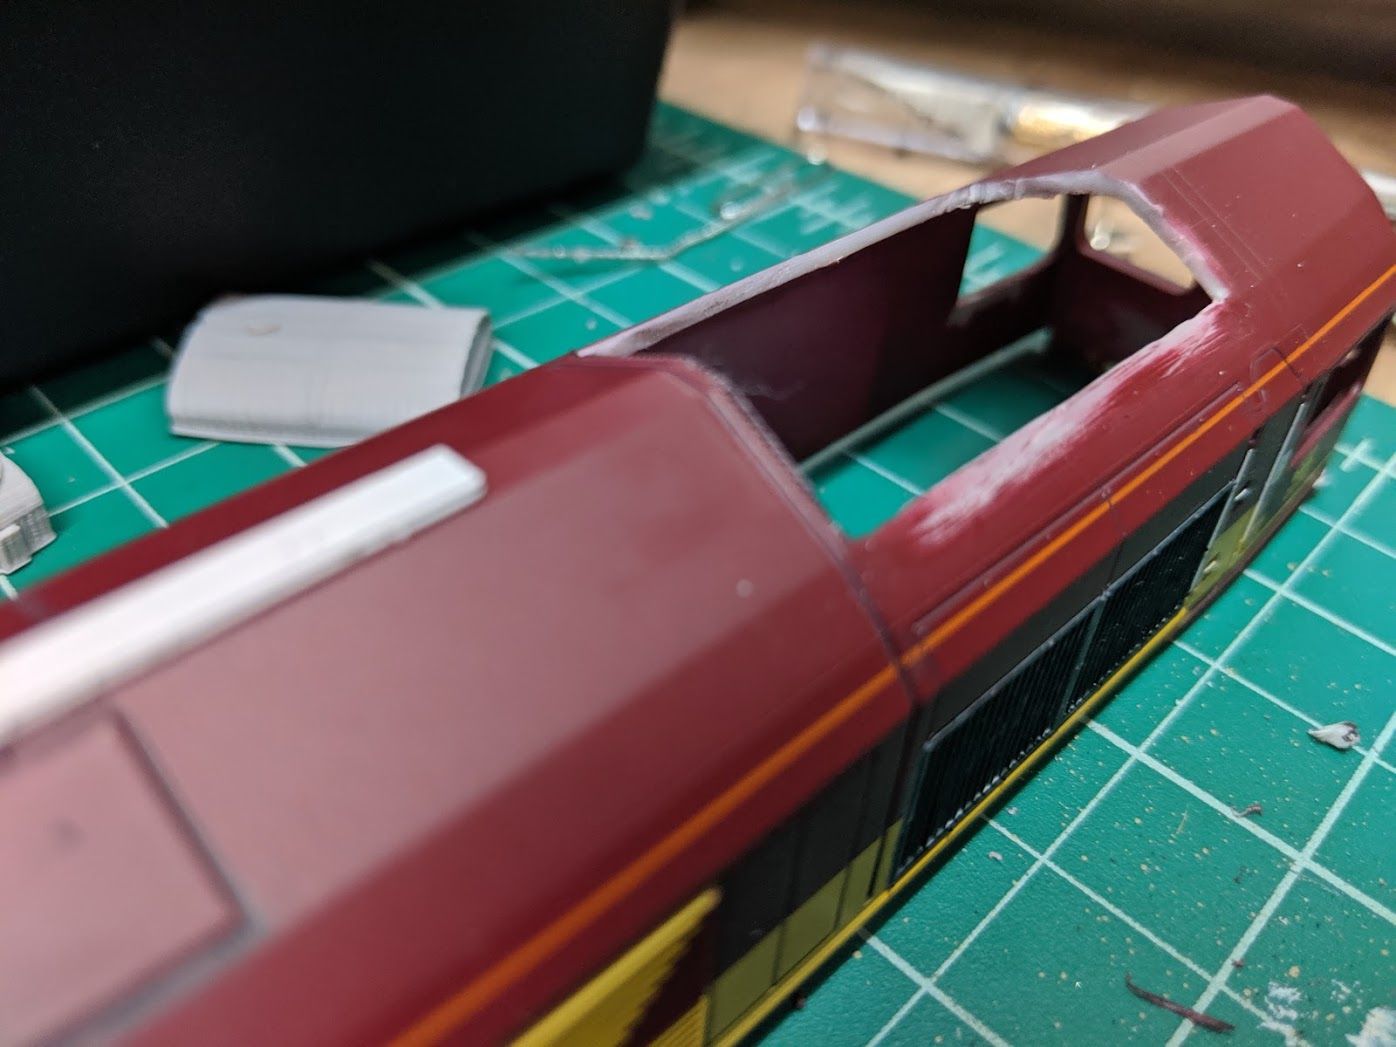
In part 1 we drilled out holes for the side markers, top marker, headlamp and tail lamps from the body shell. The chassis has some overlap around the lights with the body shell, so in part 2, we show you how to mark the chassis and cut it. We also use Tamiya Panel Liner, both Light and Dark Grey, to enhance the molded parts of the body shell and some of the grills.
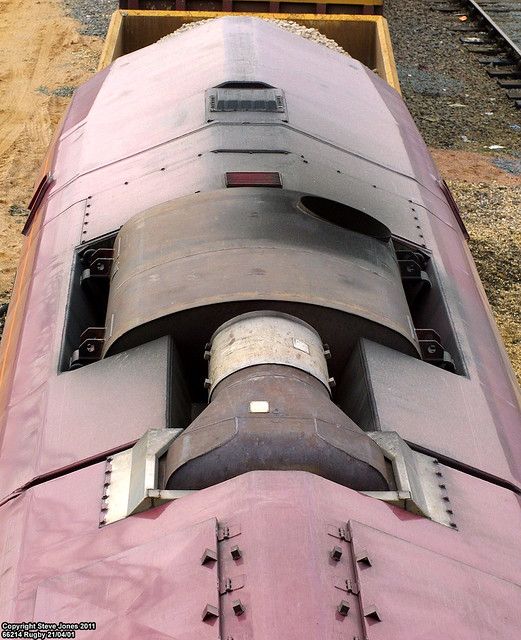
Further research showed that the roof grill wasn't nearly as transparent as the real Class 66.
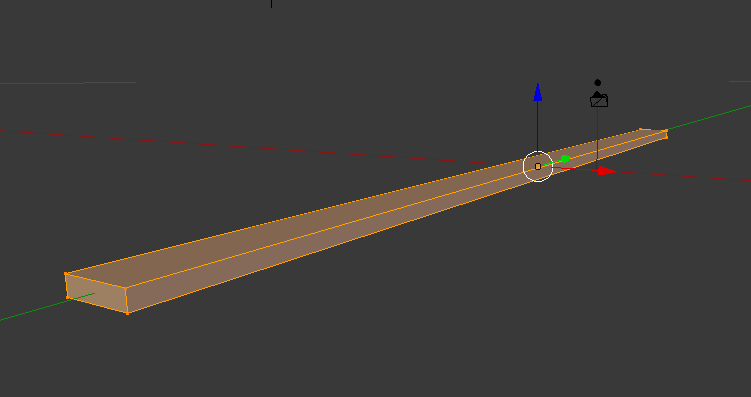
Looking at the photo above you can see the roof grill is really a mesh. Even looking from steep or straight on angles, you can clearly see an I beam along the roof and paneling below it, with the mesh on top. After checking the clearances with the motor, as this vent is above the motor, I decided to go ahead and cut the vent out. It will be replaced with a 3D printed part, but you could also use plastic card strips to fashion something similar.
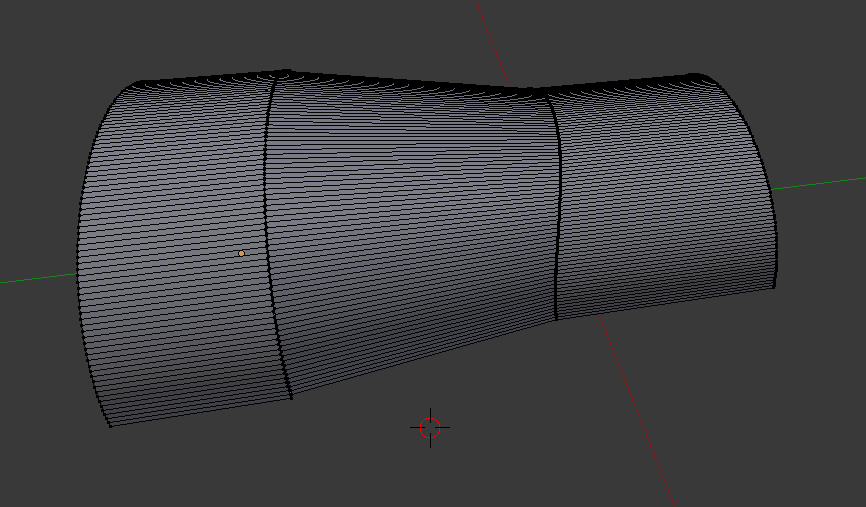
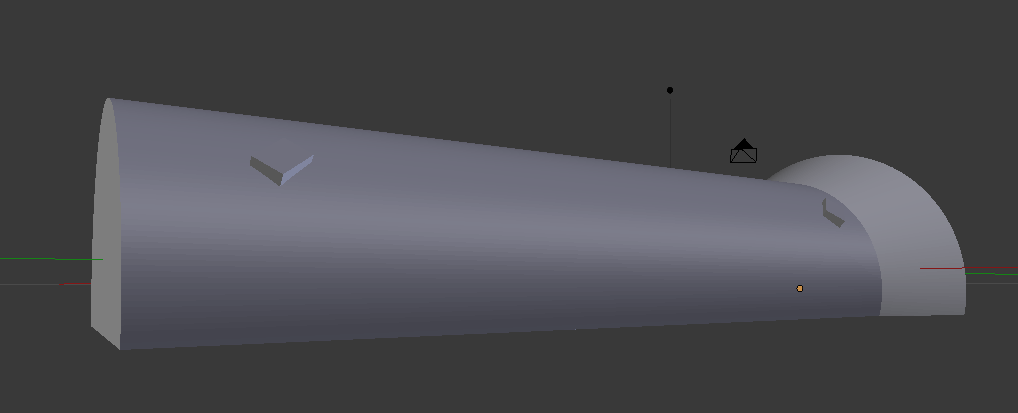

The above three parts were designed using Blender, photographs and diagrams of the Class 66. The goal was to provide a realistic looking part based on photographs, making sure the proportions looked correct with the rest of the model and that scaled measures we reasonably close. The three parts are designed to be glued together.
In addition to these parts, a roof shim was designed and added to correct the contour of the roof between the exhaust system and the vent on the roof.
Panel Line Accent Paint in Dark Grey and Light Grey were used to enhance the grills. The grills, as you can see from the photos at the start of the article aren't a jet black but are more of a gunmetal grey colour. Mixing the two accent paints enabled us to create a similar effect.
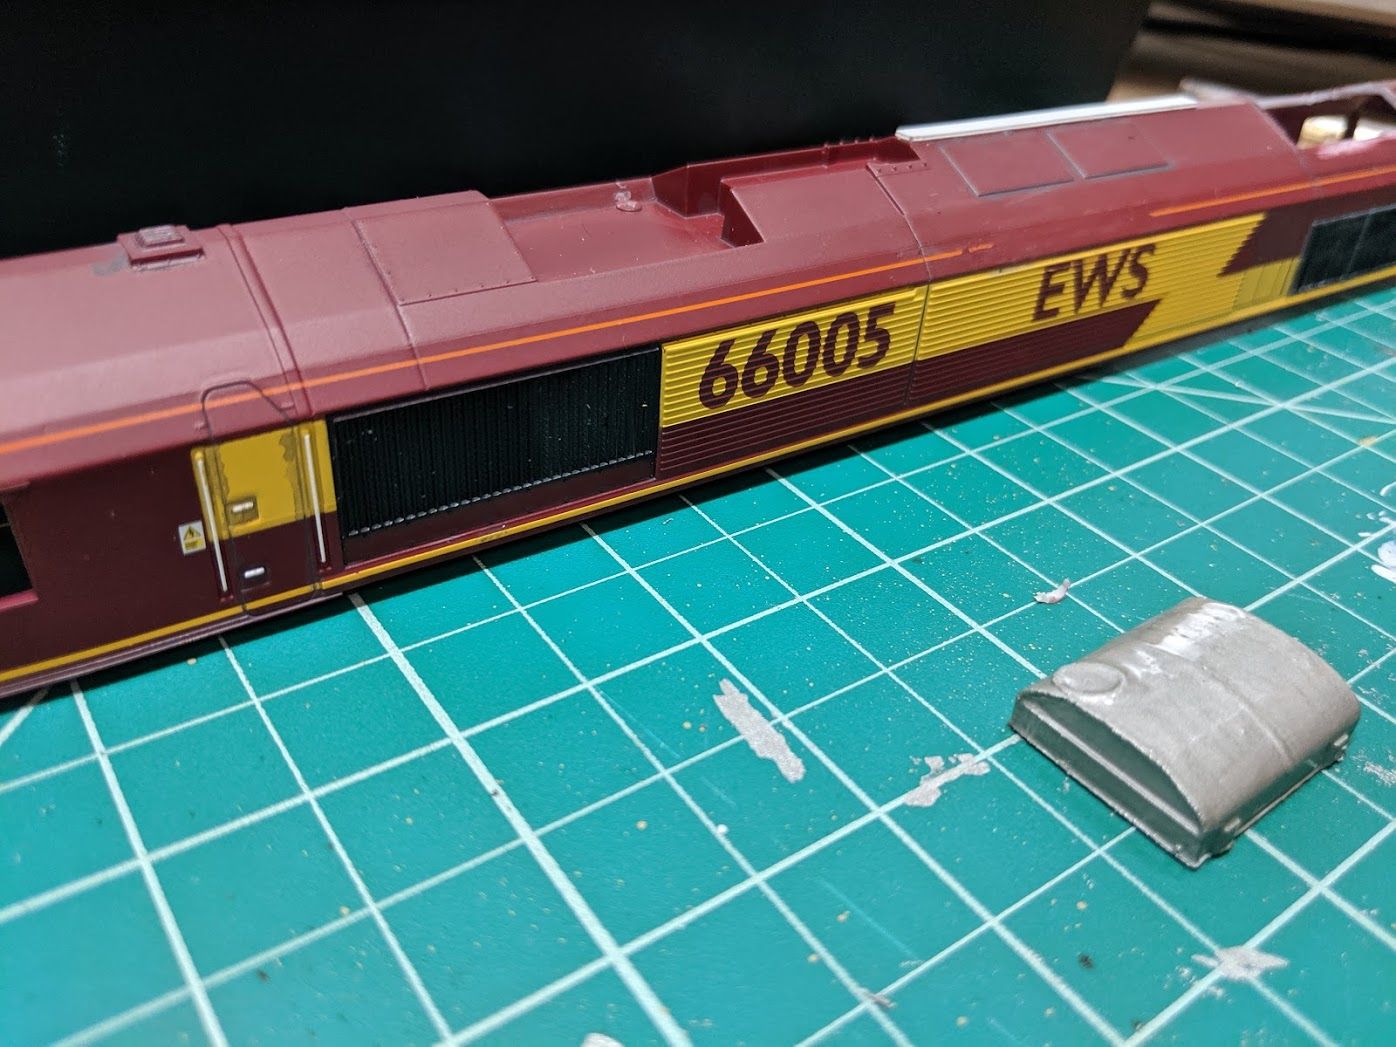
It wasn't too difficult to carefully cut the roof vents out of the model. Pilot holes were initially drilled out in opposite corners, then an knife was used to score the plastic. This was a little tedious so we went ahead and used a rotary tool with a reinforced cutting wheel to remove the roof vent.
In addition to the above photos, the following were used as reference photos:
- https://www.flickr.com/photos/58806173@N08/5825126798/
- https://www.flickr.com/photos/curly42/9531468044/
- https://flic.kr/p/9SKifE
- https://www.flickr.com/photos/f_stop13/12684489524/
- https://www.flickr.com/photos/bow_legged/6295888057/
- https://www.flickr.com/photos/emdjt42/15156032909/
- https://www.flickr.com/photos/47843_vulcan/14289382433/
- https://www.flickr.com/photos/rogerwasley/28475124757/
- https://www.flickr.com/photos/msrail_photography/15494766359/
- https://www.flickr.com/photos/153305438@N06/47985983236/
- https://www.flickr.com/photos/112818408@N03/31981534495/
Watch Part 2 here:
Project Part 3: Adding LED lighting
In Part 3 we look at adding LED lighting and different options for the Class 66. We show you how to use solder paste and a hot air gun to solder surface mount LEDs. The video looks at factors like light bleeding through the plastic and testing the rear lights in the Class 66 chassis.
Watch Part 3 here:
Project Part 4: Building the Circuits, DCC Socket and Train Testing
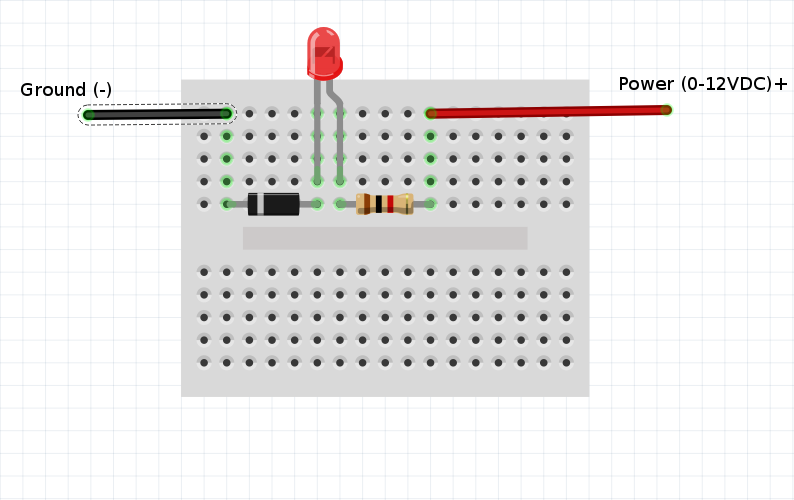
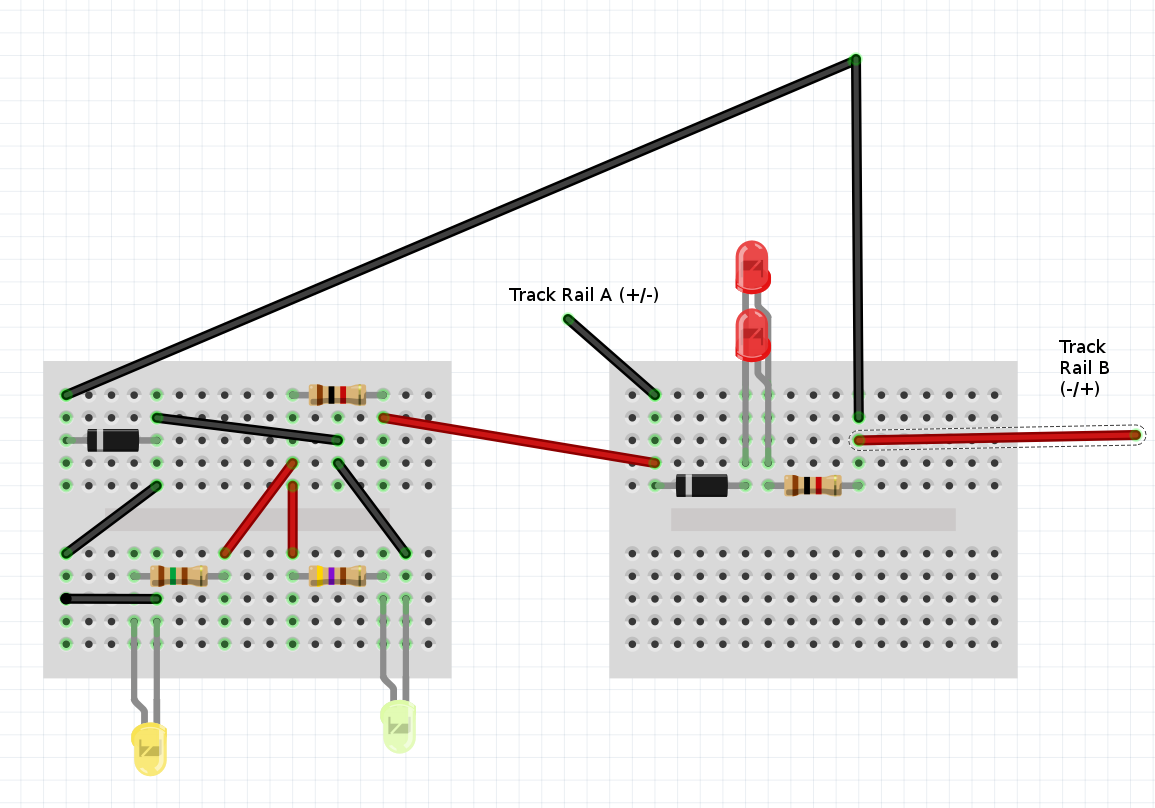
This is where things start to get really interesting. In part 4 we show you how to build out the directional lighting circuit using breadboards and electrical components. The video shows the working directional lights on the layout, how to use the DCC socket to wire up the lights in the locomotive, how to test the circuits using the chassis with breadboards and we explain what each component does.
This part of the project uses:
- SMD 0603 Red LEDs (x2)
- SMD 0603 Warm White LEDs (x3)
- Micro Broadboards - Blue (x4)
- Jumper Wires
- 1N4005 diodes (x2) - note: These are rated at 600V 1A, not 60V
- 1k resistor (x2)
- 560 Ohm resistors (x2) - note: Incorrectly called 460/470R resistors in the video
- 150 Ohm resistor (x1)
- Crocodile Clips (x2) - for testing the circuit powered by the track
- DC Power Supply (x1) - Used a H&M Clipper
- Bluetak (to secure the breadboards to the chassis)
All of these parts can be found at:
https://www.amazon.co.uk/shop/oorail.com?listId=DTJLFNLVPV6Z (UK)
https://www.amazon.com/shop/oorail.com?listId=CUMJDIE0YHFK (North America)
Part 4 Errata:
- 1N4005 diodes are rated at 600V / 1A not 60V
- 560 Ohm resistors were used (not 460/470 Ohm ones)
Watch Part 4 here:
Project Part 5:
This fifth installment of the Class 66 RHTT project involves fitting the electronics into a small form factor so they'll fit inside the Class 66, we look at the final 3D printed roof detail and look at various mesh options for the roof grill.
Watch part 5 here:
Check back on Wednesday October 9th 2019 for Part 6 for:
- 3D printed cabs
- 3D printed lamp holder
- 3D printed roof detail
- 3D printed mounting parts for silencer
- Painting and weathering
- Final testing
Comments