This is a quick how-to article on installing the Arduino IDE. The Arduino IDE is a FREE software program that lets you edit code and upload code to boards such as the Arduino Uno and ESP32 / ESP8266.
These modules can be used to control anything from lights to signals to complete automation. The oorail project has written code for many of these functions, so you can simply download our code and upload it to a board using the Arduino IDE.
In this article we will show you how to:
- Find and Download the Arduino IDE
- Install the IDE
In order to use the Arduino IDE, you will need a computer running either Windows, MacOS X or Linux. The Arduino project does offer a web based editor however this does not support ESP32/ESP8266.
Step 1: Download the Arduino IDE
The first step is to visit https://www.arduino.cc/en/main/software and download the latest version of the Arduino IDE for your computer.
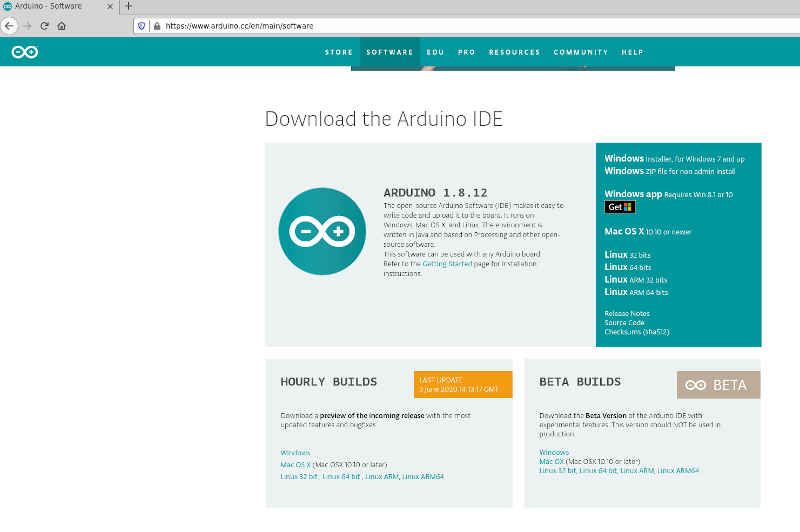
There are a couple of options for downloads, you will want to download the stable release version which is Arduino 1.8.12. Simply locate the system you are using (Windows, MacOS X, Linux, Linux ARM etc) and click to download. If you are using Linux, you will want Linux 64-bit if you are on an Intel or AMD PC, unless you are using a 32-bit PC such as an older Intel Atom based machine. If you are using a Raspberry Pi, you will want the Linux ARM 32-bit for the Raspberry Pi unless you are running the new 64-bit Raspbian on a Raspberry Pi 4 (4GB or 8GB version), in which case you will want Linux ARM 64-bit.
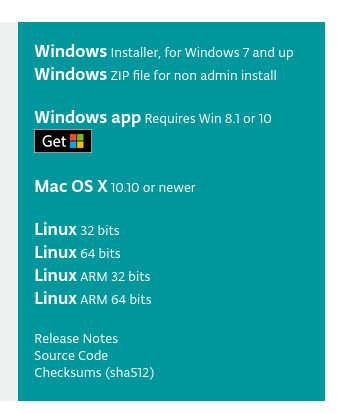
When you click on the option you want to download, you will be presented with an optional donation page. This page donates to the Arduino Project (not oorail), you can select "Just Download" if you would prefer not to donate, or you can select one of the donation amounts. We recommend downloading it, trying it out and if its something you find useful, we highly recommend going back and donating what you feel the value has been to you. This keeps projects you use and enjoy around for the foreseeable future.

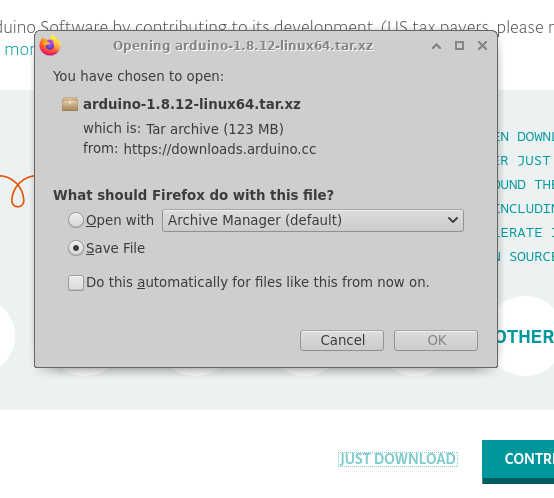
When you click either download button, you will be presented with where to save or open the download. For MacOS X and Windows, you can either open or save (then open in step 2). For Linux, we recommend that you save.
Step 2: Installation
For Windows, the downloaded file is an installer. Simply double click the downloaded file and follow the installer instructions. You can find full instructions on the Windows installer on the Arduino website.
For MacOS X, the zip file contains the application. If you are using Safari, it will automatically uncompress it for you. Once unzipped, simply copy the Arduino application to your Applications folder.
For Raspberry Pi or Intel/AMD based Linux systems, the installation has the following steps (skip to step 3 if you are running Windows / MacOS X).
For Linux, we recommend you store the Arduino releases in a dedicated directory. This makes it easier to upgrade, and then go back if anything ever breaks. In our example below, we've installed it in ~/projects/Arduino/ using the following commands:
mkdir -p ~/projects/Arduino
cd ~/projects/Arduino
tar Jxvf ~/Downloads/arduino-1.8.12-linux64.tar.xz
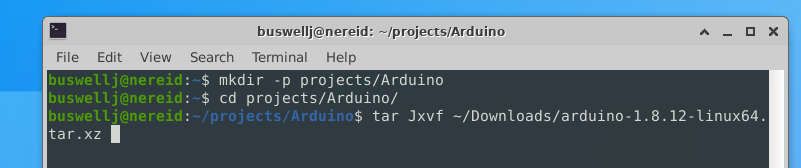
The last command will uncompress the .xz archive to the Arduino/ directory, because of the way the file is archived, this will create an directory called ~/projects/Arduino/arduino-1.8.12/.
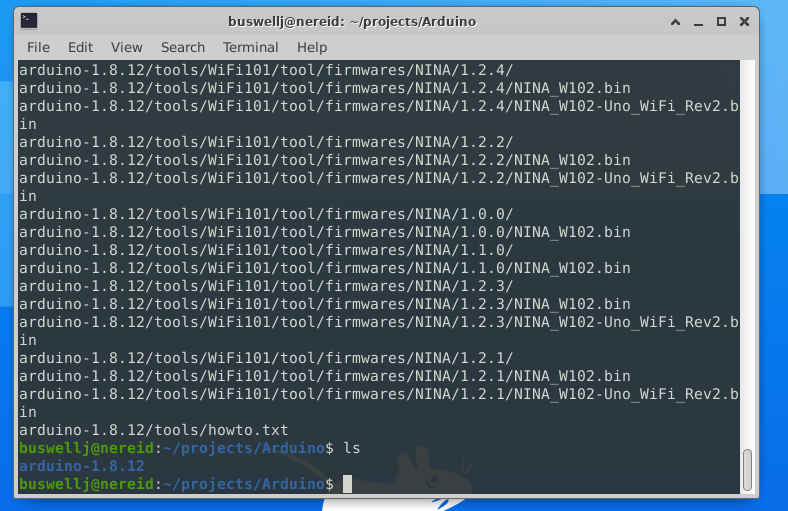
The screenshot above shows a successful installation of the archive, and that we have an arduino-1.8.12 directory.
Next we execute the installation script using:
cd arduino-1.8.12
sudo ./install.sh
Upon completion of these commands, you should see the Arduino IDE icon appear on the desktop. The installation is complete.

If you want to upgrade to a later version of the IDE in the future, simply follow the same steps, except instead of arduino-1.8.12, it would be arduino-X.Y.Z where X.Y.Z is the new version number.
Step 3: Starting the Arduino IDE
The final step is to launch the Arduino IDE and make sure that it works. To do this, simply double click on the Arduino IDE icon on the desktop. For MacOS X, if there is no icon on the desktop or in the dock, use the searchlight magnifying glass in the top right hand corner to search for Arduino.
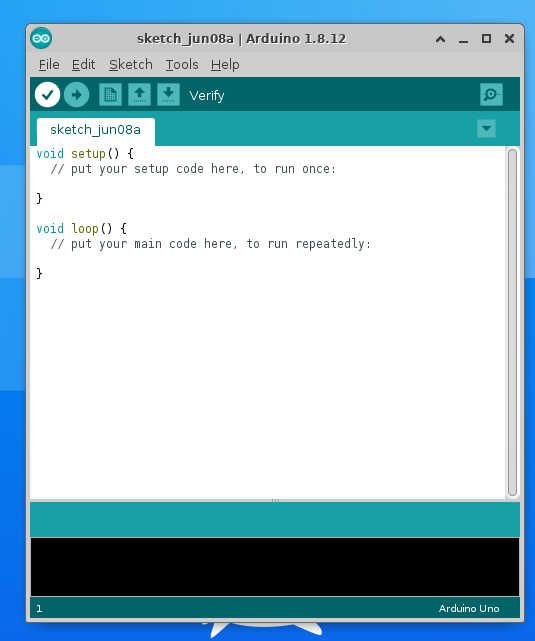
When you launch the application, you will be presented with an empty sketch (what Arduino refers to as a program):
Next Steps
Now that you have the Arduino IDE successfully installed on your computer, you will need to set it up for use with the ESP32 and ESP8266 boards. To find out how to do this, follow the next article in our series:
Comments