The ESP32 and ESP8266 are low cost (under USD$5 each) system on a chip (computers) that can be programmed to perform specific tasks. These modules have integrated WiFi and Bluetooth, and a healthy selection of digital i/o pins. They are faster and have more memory than the Arduino Uno / Mega platforms. In this article, we will walk you through the setup of the ESP32 and ESP8266 on the Arduino IDE software. The Arduino IDE software is available for FREE, if you haven't installed it yet, you can follow the previous article in this series:
In this article we will:
- Explain why this is of interest to Railway Modellers
- Explain why you don't need to be skilled at computers
- Explain how its different from traditional electronic options
- Walk you through configuring the Arduino IDE for ESP
Why are we using the Arduino IDE?
The Arduino IDE is a software application that will take our code and convert it to something the ESP32/ESP8266 boards can understand. The Arduino IDE is designed with beginners in mind, so it is very easy for people with no previous computer skills to use. In this article, we will be adding support for the ESP32 and ESP8266 boards to the Arduino IDE.
Is there anything I need to do before following this guide?
Yes, you will want to have installed the Arduino IDE on your computer. You can download and install the Arduino IDE for Windows, MacOS X and Linux from https://www.arduino.cc/en/main/software.
You will also need an ESP32/ESP8266 module, USB to micro-USB cable, a breadboard and solid core wire. However those aren't necessary to setup the software. We recommend that you try setting up the software first or while you are waiting for the hardware components to arrive. If you need a shopping list, you can use these Amazon links and help support our project too. We recommend getting at a minimum:
- ESP32 or ESP8266 modules
- Jumper Wires (male and female) or solid core wire
- Breadboards
You can find these on these lists that help support our project:
What has this got to do with Model Railways?
The ESP32/ESP8266 modules can be used to control everything on your layout, from turning lights in specific buildings on and off, to controlling train identification, train detection, level crossings and even controlling your DC or DCC powered locomotives. There is no limit to what you can control with the ESP32/ESP8266 modules on your railway.
I'm a Railway Modeller not a Computer Programmer!
You don't need to have any computer programming skills to use the ESP32/ESP8266. We have written the code and make it available for FREE for you to download under an Open Source license. All you have to do is download our code, add in your WiFi information to your local copy of the code, and send it to the ESP32/ESP8266 module when its plugged into your computer. It is far simplier than trying to wire an ECoS to a DCC Concepts Cobalt setup.
How is this different from DCC Concepts or Megapoints products?
This solution uses software to provide the logic rather than proprietary hardware. One key advantage is that new features, updates and bug fixes can be easily uploaded via a software update. Hardware products such as those from other companies require replacing the board to a newer version. Another key advantage is the PRICE. The modules we use are industry standard off-the-shelf components, lower cost and higher spec than whats provided in proprietary solutions. The software is available for FREE. So with less work than trying to install a proprietary solution, you can download and go with much more advanced features. Our software leverages the use of WiFi, even if you don't have WiFi, the system can create its own WiFi network between components. This means that you will have less wires (just power) going around your layout. Finally, our system can leverage a large number of available sensors, bringing a range of new data and metrics from your layout, helping you identify problems and improve running on your layout.
Getting Started...
Alright, so now that you know why you would want to embark on this adventure, lets get started with how. If you haven't already installed the Arduino IDE, you can follow this guide first ...
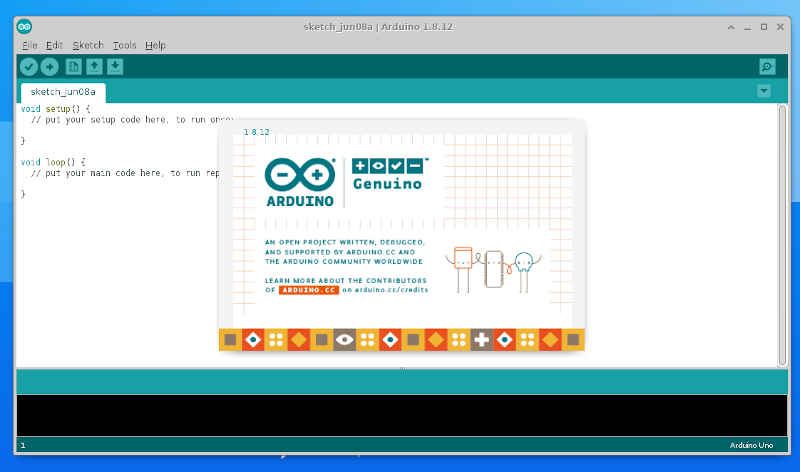
You will also need to be connected to the Internet. Start up the Arduino IDE and check the version by clicking on Help then About. You should see a screen like this one, the version number here is 1.8.12. Click anywhere on the screen to return to the application. If you are running a much older version than 1.8.12, you should consider upgrading.
Step 1: Adding the ESP Board URL
The first setup step is to tell the Arduino IDE where to get the ESP32/ESP8266 board information from. To do this we go to the File menu, then click Preferences and you will get a screen a bit like this one:
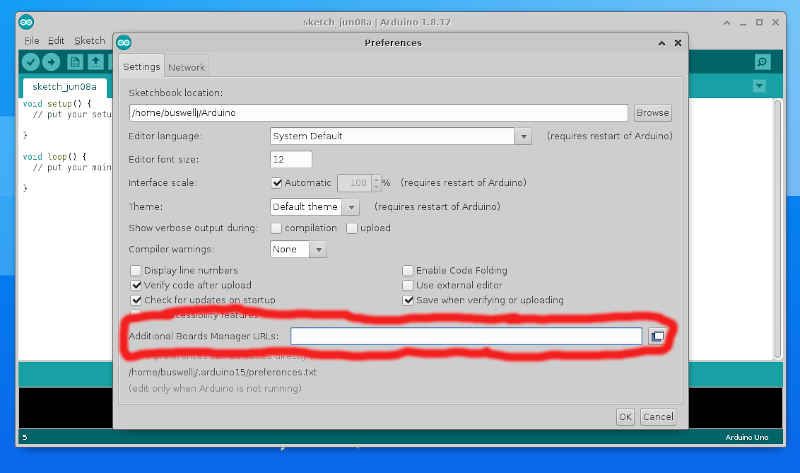
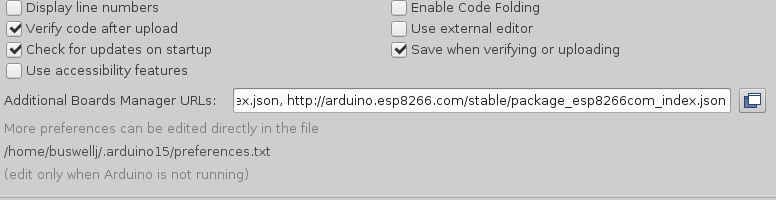
You want to add the ESP information to the "Additional Boards Manager URLs", simply copy and paste the block below into the box, then click OK.
https://dl.espressif.com/dl/package_esp32_index.json, http://arduino.esp8266.com/stable/package_esp8266com_index.json
Not required for most users:
If you already had Arduino IDE installed, and you had something in the Additional Boards Manager URLs box, simply add a comma to the end of whats in there, then paste the above.
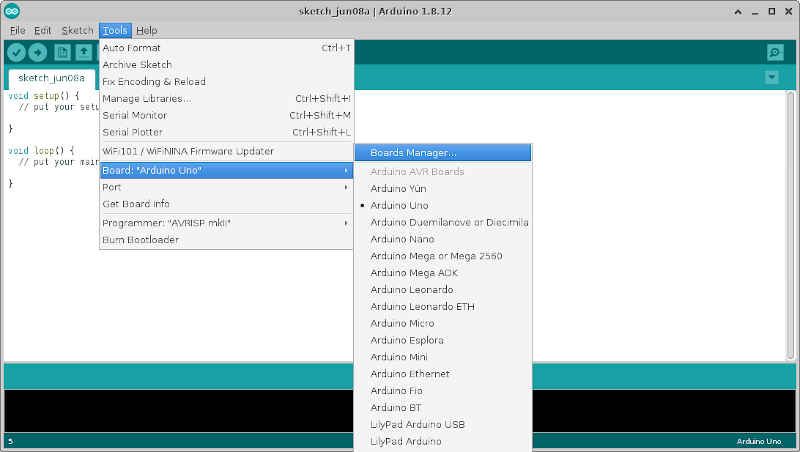
Step 2: Using the Boards Manager
Now that you have told Arduino IDE where to find the information about the ESP32/ESP8266, you need to enable those boards via the board manager. To access the board manager, click on the Tools menu, then look for the Board: option, it will likely say Board: Arduino Uno, as this is the default. Move the mouse over this and a side menu will appear, at the very top of that side menu you will see "Board Manager", click on this.
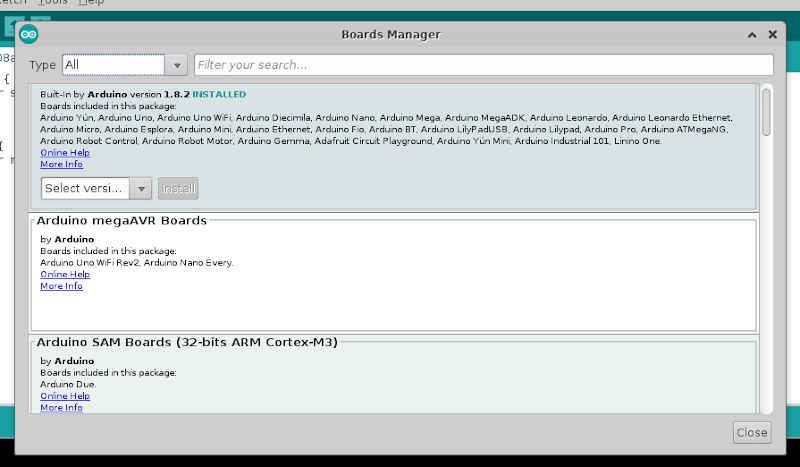
You will be presented with the Board Manager screen:
Next do a search for ESP in the search box like this:
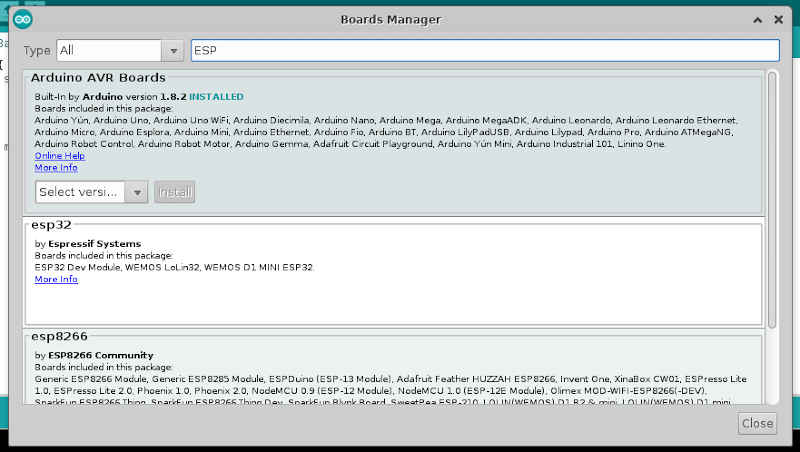
You are interested in the ESP32 and ESP8266 options, as you can see here:
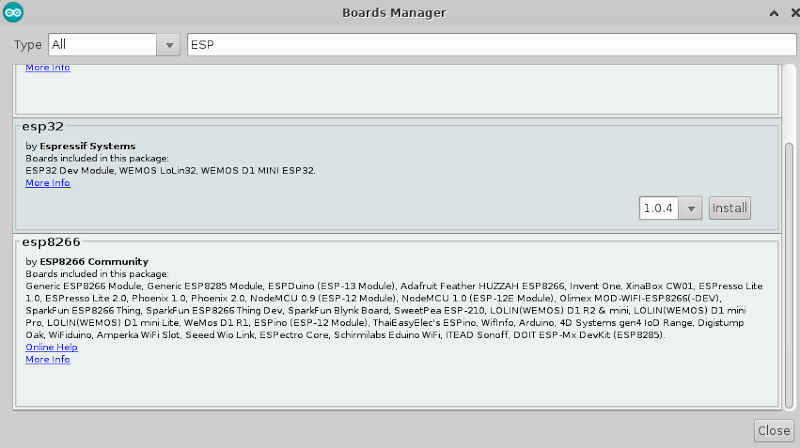
Next, simply select install for the ESP32 and it will download the packages from the Internet. You have the option here to select different versions, we recommend using the latest version, but if you run into problems, you can always select an older version that you know works.
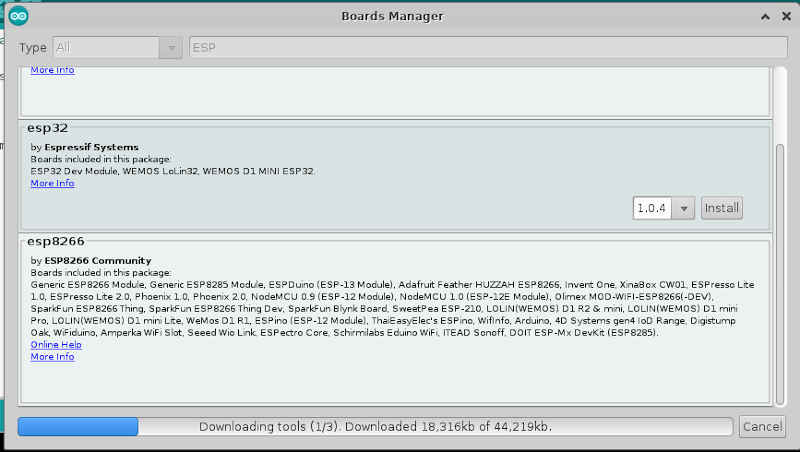
Once you have completed the ESP32 installation, repeat the process for the ESP8266.
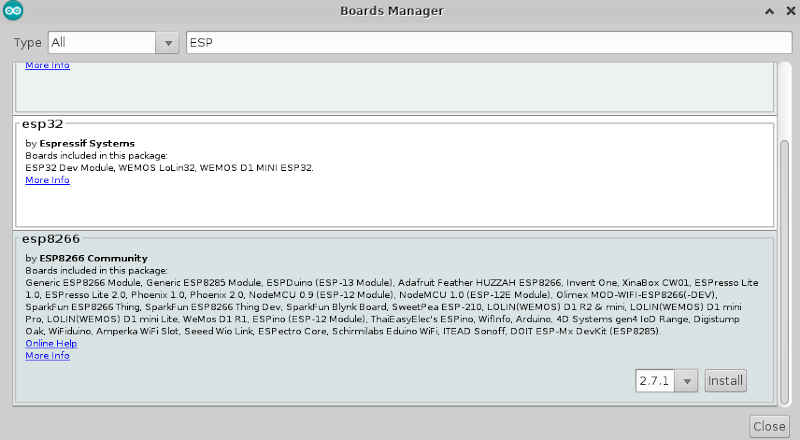
Note the ESP32 and ESP8266 are different software releases, this is why (at the time of writing), the ESP32 code is version 1.0.4, while the older ESP8266 module is version 2.7.1.
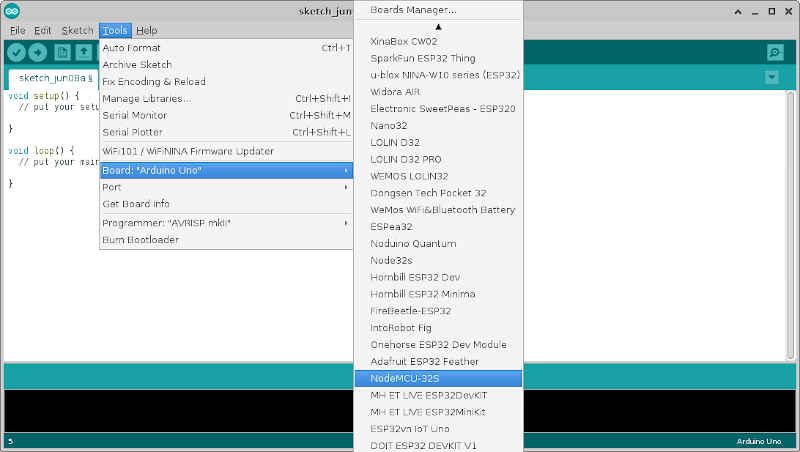
Step 3: Select your Board type
Even if you are waiting for your board to arrive, you can still verify the boards are installed and select it. Simply select the Tools menu again, put the mouse of the Board: xxxx menu item (usually Board: Arduino UNO), then move down the side menu that appears and look for your specific ESP32 or ESP8266 board. Unless you have purchased a specific brand name module, you will want to use the generic NodeMCU-32S for ESP32, or either the Generic ESP8266 or NodeMCU 1.0 for ESP8266. The ESP32 and ESP8266 board lists are in separate sections of the list. Usually the vendor will advise which option to use in your product documentation.
Next Steps...
In the next upcoming article, we will show you how to connect your ESP32 or ESP8266 board to your computer and how to test it.
Comments